Learn how to make beautiful retro sequin ball ornaments in this DIY tutorial

Every year, our family makes ornaments as part of our Advent calendar. Our Advent calendar is filled with holiday centered activities that we do as a family. It’s a fun way to take time out of the busy holiday season and actually celebrate and experience Christmas. My family has grown to love it and each year we each choose our own ornament we’d like to make. This year, I choose retro sequin ball ornaments.
Making this ornament is fairly easy, just time-consuming. Surprisingly, I found it to be a relaxing exercise! I hadn’t made one of these in years, so I was a little rusty. So I’ll share how I made these and what I learned from the mistakes I made!
SUPPLIES
- Wire, approx 3-4″
- Styrofoam ball 2.8″
- Small pliers
- Wire cutters
- Sequins
- Craft pins
- Ribbon / String / or Ornament Hook

INSTRUCTIONS
- Before you begin, take a wire (in a pinch you can use a large paper clip). Insert the wire in the top of the ball ornament. Push straight through the center. You can do this at any point. However, I’d recommend doing it before you put sequins on. If for some reason you don’t go strait on your first attempt, you may destroy the hard work you’ve done. Therefore, I recommend doing it before you begin decorating. This will create a way to attach an ornament hook or string for hanging.
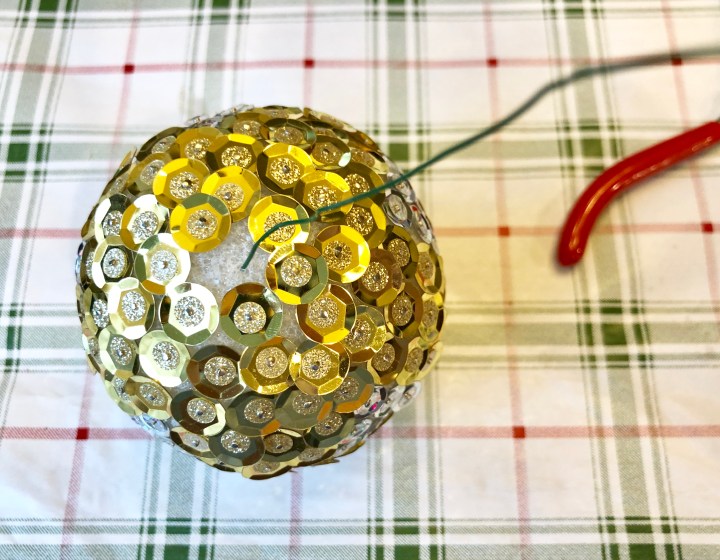
2. Once through, trim wire on the top and bottom to about a centimeter.

3. Using pliers, curl each wire end into a loop. This stops the wire from sliding on either end and will allow you to hang it.

4. When it comes to sequins, you can choose any that you like. I choose silver and gold since one of my trees is themed that color. You can choose different size sequins as well. I recommend putting them in ziplock bags or containers to control the mess or if you may need to clean off you workspace before you’re finished.

5. You’ll need craft pins. Some come with a decorative head and others have a flat head. I used short pins, but I recommend using larger ones. I found that using short pins are easily pulled out. The longer the pin, the more reinforced it is.
6. You decide on the design and how many colors you use. I did opposing triangle shapes surrounded by gold. If you need to, you can draw an outline on the styrofoam it will eventually be obscured by the sequins.


7. If you’ve never used sequins before, you want the sequins to be placed with the facets facing upwards. This allows for maximum shine. You can choose to layer the sequins as I did. I put the smaller ones on top of the big ones for added interest and texture.


8. Next, add your sequins, making your way around the ball trying to close any gaps you see, to the best of your ability.
9. Once done, add your ribbon or ornament hook. It’s now ready for hanging!

If you’re looking for more fun things to do at Christmas time, see the post The Ultimate Christmas Bucket List
Retro Sequin Ornaments first appeared on My Beautiful Mess
One thought on “Retro Sequin Ball Ornaments”